A little while ago I wrote A Guide to Styling an Ionic 2 Application which covered how theming works in Ionic 2, and how you should go about styling your Ionic 2 applications. This covered everything at a reasonably high level, including:
- What SASS is and how it is relevant to Ionic 2
- Using attributes to style elements
- How to use SASS variables
- How to create your own custom styles
At the end of that post you should have a reasonable understanding of how to go about creating your own themes in Ionic 2. If you haven’t read that post already, or are not really sure how to style Ionic 2 applications I would recommend reading that post first.
I’ve been doing a lot of work with Ionic 2, including creating a lot of custom themes, and in this post I am going to focus on some specific “tips & tricks” that I think are relevant to Ionic 2 development.
Before we Get Started
Before you go through this tutorial, you should have at least a basic understanding of Ionic 2 concepts. You must also already have Ionic 2 set up on your machine.
If you’re not familiar with Ionic 2 already, I’d recommend reading my Ionic 2 Beginners Guide first to get up and running and understand the basic concepts. If you want a much more detailed guide for learning Ionic 2, then take a look at Building Mobile Apps with Ionic 2.
1. Use Nested CSS Rules
If you only pay attention to one tip in the post, make it this one. I think it is by far the most useful tip, and a great benefit of using SASS for CSS (you can’t do this with vanilla CSS).
As you may know, when you create a new component using the following command:
ionic g page MyPagea my-page.scss file will automatically be generated for you, and you can use this to place all the styles that are specific to this component (don’t forget to import the .scss file into app.core.scss).
One understandable misconception I often see, is that any styles you put into this file will only effect that component. So if I put the following rule:
p {
  color: red;
}
into the my-page.scss file, it will only effect the MyPage component. This is not the case. Any rules you add to this file will still be applied across the entire application.
There is a way to restrict the scope of your CSS rules to just that one component though. You can use nesting in your .scss file to achieve this. If you give your content area in the my-page.html template a class like this:
<ion-content class="my-page"> </ion-content>and then nest your CSS rules inside of a .my-page rule like this:
.my-page {
  p {
    color: red;
  }
}
then only paragraphs in the MyPage component will have a colour or red. I’d recommend always doing this by default, and if you have any styles you want to effect the entire application then you should put them in app.core.scss.
Keep in mind that this only works for elements that are inside of <ion-content class="my-page">, if you wanted to target the <ion-navbar> for example, you would need to place the CSS rule outside of .my-page in the .scss file.
2. Make Use of SASS Variables in Custom Rules
One important concept in software development is DRY (Don’t Repeat Yourself), which in technical terms says:
or in other words, don’t code the same thing twice. SASS variables, like the ones available here, are a great way to help adhere to this principle. It provides a single definition for a certain style that can be used throughout your application in various places. If you ever need to change that style, you only need to do it in one place.
You may already be familiar with overriding these SASS variables in the app.variables.scss file to alter the style of your application, but you can also make use of the variables in your own custom styles.
One good example that you should likely be making use of is the colours map that is defined by default in app.variables.scss:
$colors: (
  primary: #387ef5,
  secondary: #32db64,
  danger: #f53d3d,
  light: #f4f4f4,
  dark: #222,
  favorite: #69bb7b
);
Let’s say you want to change the background colour on certain pages in your app, you might usually do something like this:
.home {
  background-color: #387ef5;
}
instead, it may be better to do something like this:
.home {
  background-color: map-get($colors, secondary);
}
Now your background colour will be the same as the secondary colour for your application. This makes the application much more customisable, because now you only need to change the value in one place to update every page in your application. You don’t have to use the predefined variables either, you could add your own background colour to the $colors map if you wanted to.
3. Don’t Stress Over Using Variables
As I mentioned above, SASS variables can be super handy. However, I’d recommend not stressing about using the predefined Ionic variables.
There’s a ton of variables available, and you may end up spending too much effort trying to track down what variable you need to change, when it may be just as easy to create your own simple CSS rule.
My advice would be to be as familiar with the variables as you can, because they may save you some effort and make the app more flexible, but don’t feel dirty for creating your own rules.
4. Understand Flexbox
I’m not going to spend too much time explaining Flexbox in this post, because I’ve already covered Flexbox briefly here, but I do want to highlight how useful it is.
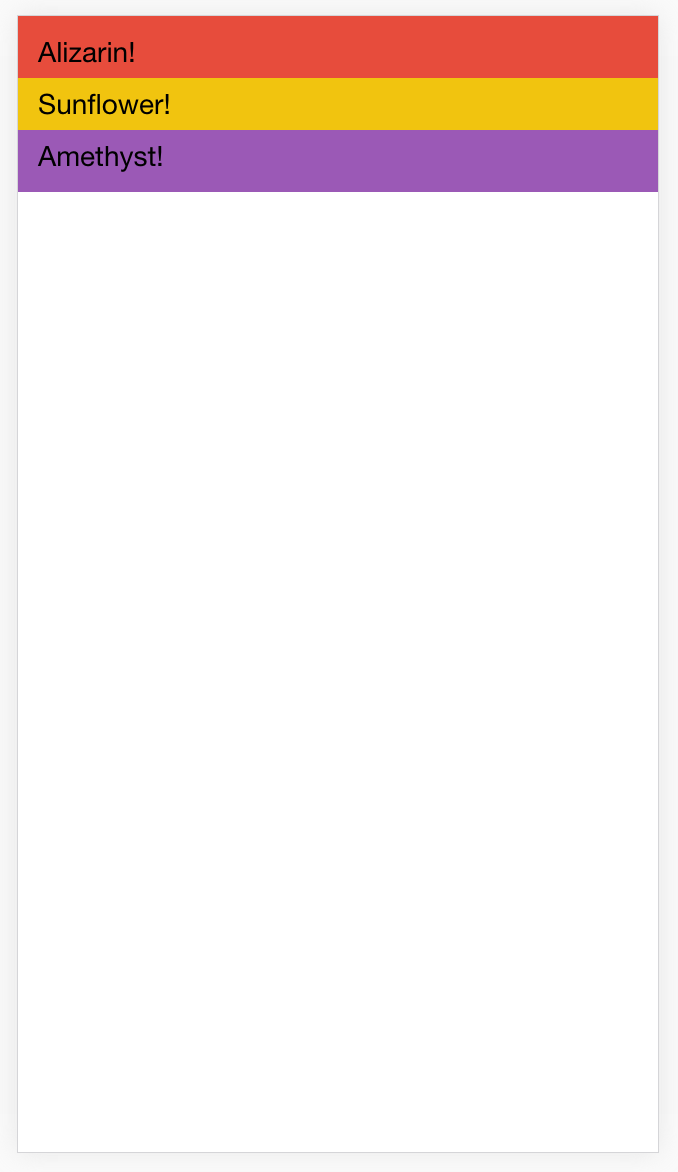
Flexbox makes it really easy to manage the position of elements with non fixed sizes within a container. The example I gave in the tutorial above was of a page where I wanted to create three boxes of equal size that would fill the entire screen. Before adding flexbox, the layout would look like this:
But after adding the following rules:
.home {
  scroll-content {
    display: flex;
    flex-direction: column;
  }

  ion-row {
    flex: 1;
  }
}
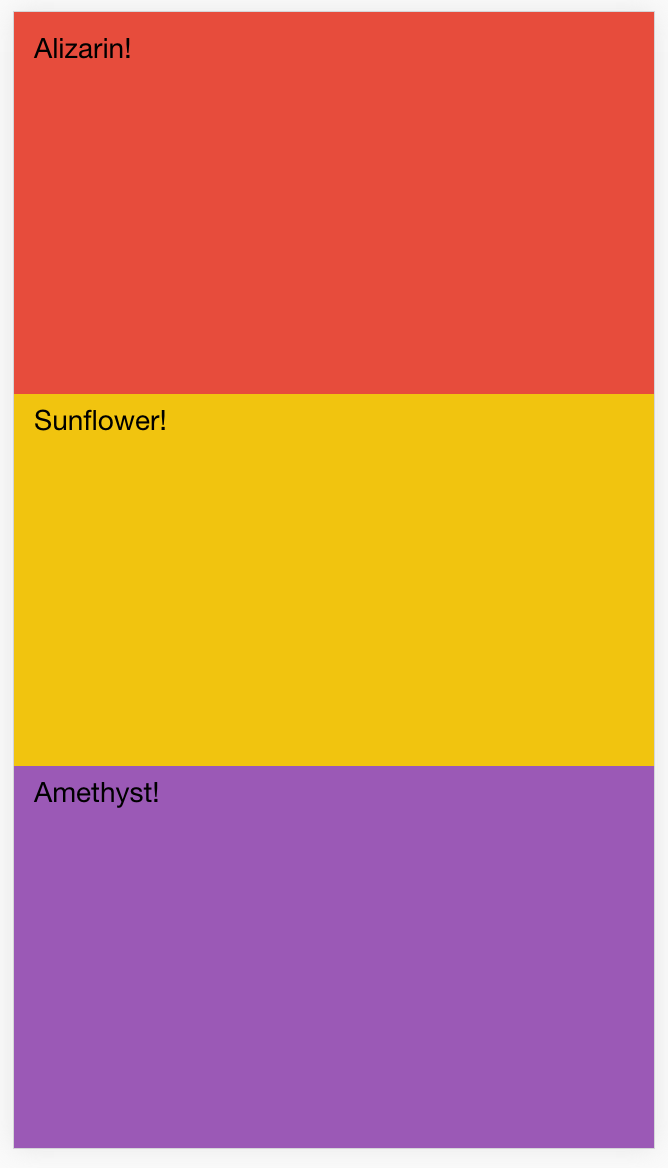
each box (<ion-row>) will expand to fill the available space equally (since they all have an equal flex value), and would now look like this:
The scroll-content referenced in the code above is automatically added inside of <ion-content>, you don’t add this element yourself.
There’s a lot to know about flexbox, and it isn’t the easiest topic in the world, but it would be well worth your effort to start learning how to make use of it. The downside of flexbox is that, although it has pretty good support across modern browsers, it isn’t supported in IE9 and below – we don’t need to worry about that with Ionic though (assuming you’re building a hybrid app with Cordova, not a web app).
5. Understand Selectors
This has more to do with vanilla CSS than Ionic 2, but it is important to understand how selectors work in CSS. Many of you will likely be familiar with the basic selectors, that may look like this:
body– this will target the<body>element on the page.my-class– this will target any element that has a class ofmy-class#my-id– this will target an element with an id ofmy-id
However, selectors can get a little more complicated than that, and it can come in handy to know how to make use of them. Take combinator selectors for example, they look like this:
ion-row ion-list {
  color: red;
}

ion-row > ion-list {
  color: red;
}
At a glance, both of these rules look like they would be doing the same thing, except one contains a > (this is a child selector) and one does not (a descendant selector). If we were to use the descendant selector it would target any <ion-list> found inside of any <ion-row>, which would match both of the lists in the following code block:
<ion-row>
  <ion-list>
    <ion-item></ion-item>
    <ion-item></ion-item>
  </ion-list>

  <div class="some-container">
    <ion-list>
      <ion-item></ion-item>
      <ion-item></ion-item>
    </ion-list>
  </div>
</ion-row>
But if we were to use the child selector it will only match an <ion-list> if it is a direct child of an <ion-row>. This would mean it would match the first list, but it wouldn’t match the second list because it is inside of a <div>. If we wanted to match that second list using the child selector we would need to use this combinator: ion-row > div > ion-list. Remember that you only need to do this if there is a reason you need to be specific, if there is just one list on the page or you just want to target all lists on the page you can just use a simple ion-list selector.
Then we have Pseudo-classes, which come in the following format:
selector:pseudo-class {
}
These identify special states of an element. Pseudo-classes can be things like :hover which will apply a style when an element is hovered over (you are probably familiar with this), but there are also more complex psuedo-classes like :last-child and :first-child. If you wanted to add some styling only to the last item in a list for example, you could use the :last-child pseudo class.
In most cases, you will likely only need to use simple selectors for your CSS rules, but knowing how to use more complex selectors can come in very handy.
6. Understand Specificity
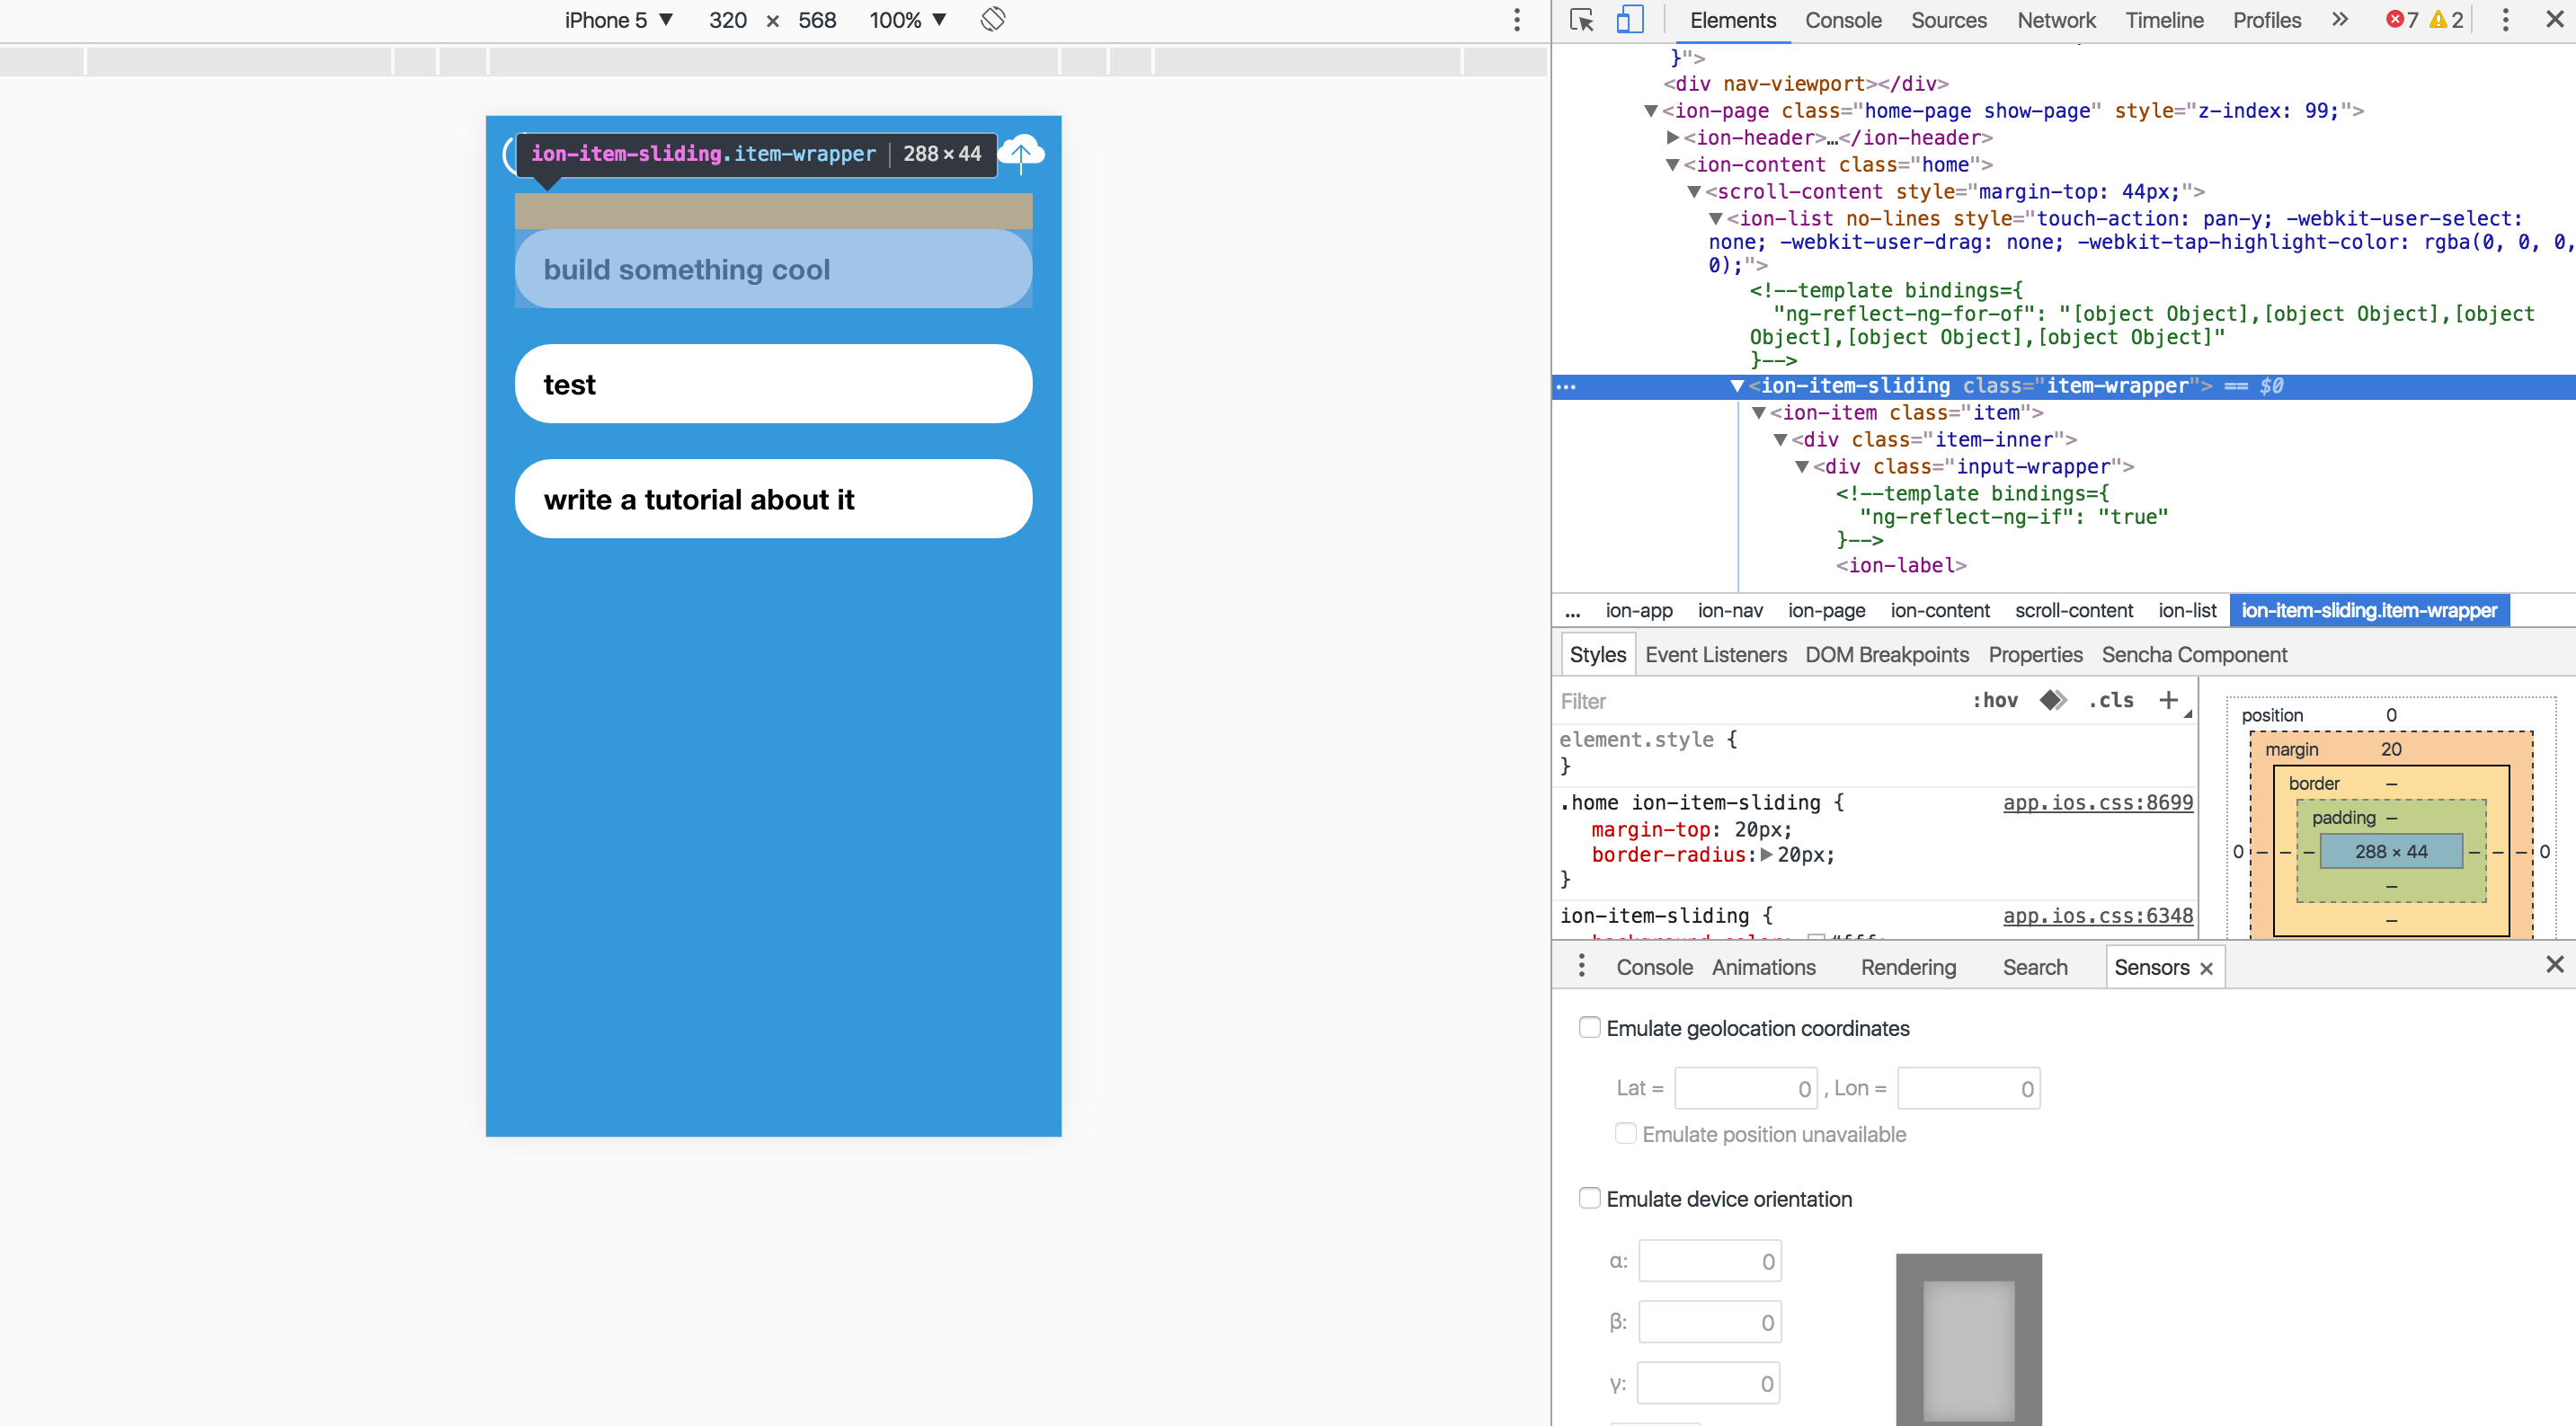
When creating a custom CSS rule, a great way to find out what you want to style is to Right click > Inspect element and hover over the node in the DOM that you are after (the highlighting on the content helps a lot with this):
From that we might know that <ion-item-sliding> is the element that we want to target. So we add a rule in the .scss:
ion-item-sliding {
  background-color: red;
}
and expect to see the change. Sometimes this doesn’t work though, because Ionic might also be providing some styles for the same element that might override yours.
It’s important to understand the concept of specificity in CSS, and by “understand” I mean just know that it exists because the way it works at a low level is pretty complex. Essentially, the most “specific” rule is the one that will be applied. So taking the example above, where the DOM looks like this:
<ion-content>
  <scroll-content>
    <ion-list>
      <ion-item-sliding class="item-wrapper">
        <ion-item class="item">
          <div class="item-inner">
            <div class="input-wrapper"></div>
          </div>
        </ion-item>
      </ion-item-sliding>
    </ion-list>
  </scroll-content>
</ion-content>
Notice the extra elements here like <scroll-content> and <div class="item-inner">, these are there because they are added when the app is being rendered to the DOM, they are not actually contained in the actual template file you create.
We can target the element we want using just:
ion-item-sliding {
}
or we could be more specific and use:
ion-list ion-item-sliding {
}
or even:
ion-content ion-list ion-item-sliding {
}
Let’s say we defined a style with a selector of ion-item-sliding but the Ionic CSS already has a more specific selector for this as well, then the Ionic style will “win” and be applied instead of yours. In order to “beat” it you just have to be more specific, for example by using the last suggestion above: ion-content ion-list ion-item-sliding.
If you’re stuck, you can also use the !important rule, like this:
ion-item-sliding {
  background-color: red !important;
}
which is basically just a cheat code to give the rule higher specificity. It can get messy if you rely on this too much though, so avoid using it wherever possible.
Summary
These are just a few tips that seem relevant in my experience with Ionic 2, but CSS and SASS are huge topics that we’ve only scratched the surface on (though that is often all you need). If you have any of your own tips, please leave them in the comments!


