Last week, I wrote a tutorial that walked through how to set up a CouchDB database on a self-hosted Ubuntu server. I talked about some of the benefits of going for a self-hosted approach over using a service like Cloudant.
One of the big benefits of the CouchDB protocol is how portable it is. With a lot of backend solutions, it can be extremely hard to move data from one place to another. With CouchDB, we can easily and almost instantly replicate the data in the database to any other database that uses the CouchDB replication protocol.
This means that we can easily move a Cloudant database to a self-hosted CouchDB installation, or we could move data from our self-hosted server to a local CouchDB database, or vice versa. These replications can either be “Once-off”, or they can be “Continuous” in which case the data will consistently be replicated over time.e This is useful for many reasons, including:
- Migrating from one infrastructure to another
- Creating backups of your data
- Scaling for high usage
- Creating local copies of data for offline usage (e.g. PouchDB)
In this tutorial, we are going to walk through how to replicate data from Cloudant to a self-hosted CouchDB database. This means that we can take all of the documents in a database, and copy them over into another CouchDB database (either creating a new database or updating the documents in an existing database). Although we will specifically be looking at how to replicate a Cloudant database to a CouchDB database, the same concepts will apply to any CouchDB style database.
Before We Get Started
To begin with, I’ll assume at this stage you have a fresh CouchDB installation as in this tutorial. If you already have a CouchDB installation that you want to work with, that’s fine, you may just have to slightly modify some steps.
Preparing the Target Database
When performing a replication we will have a source database and a target database. Our source will be the database we want to replicate, and the target will be the database we want to replicate to.
You do not have to create the target database beforehand, however, if your database is private you will need to. By default, a CouchDB database without any users defined will be public. Therefore, if we allow the replication to create the database for us, no users will be defined and the database will be accessible publicly.
IMPORTANT: Make sure to add a member to the target database before replication if your database is not public.
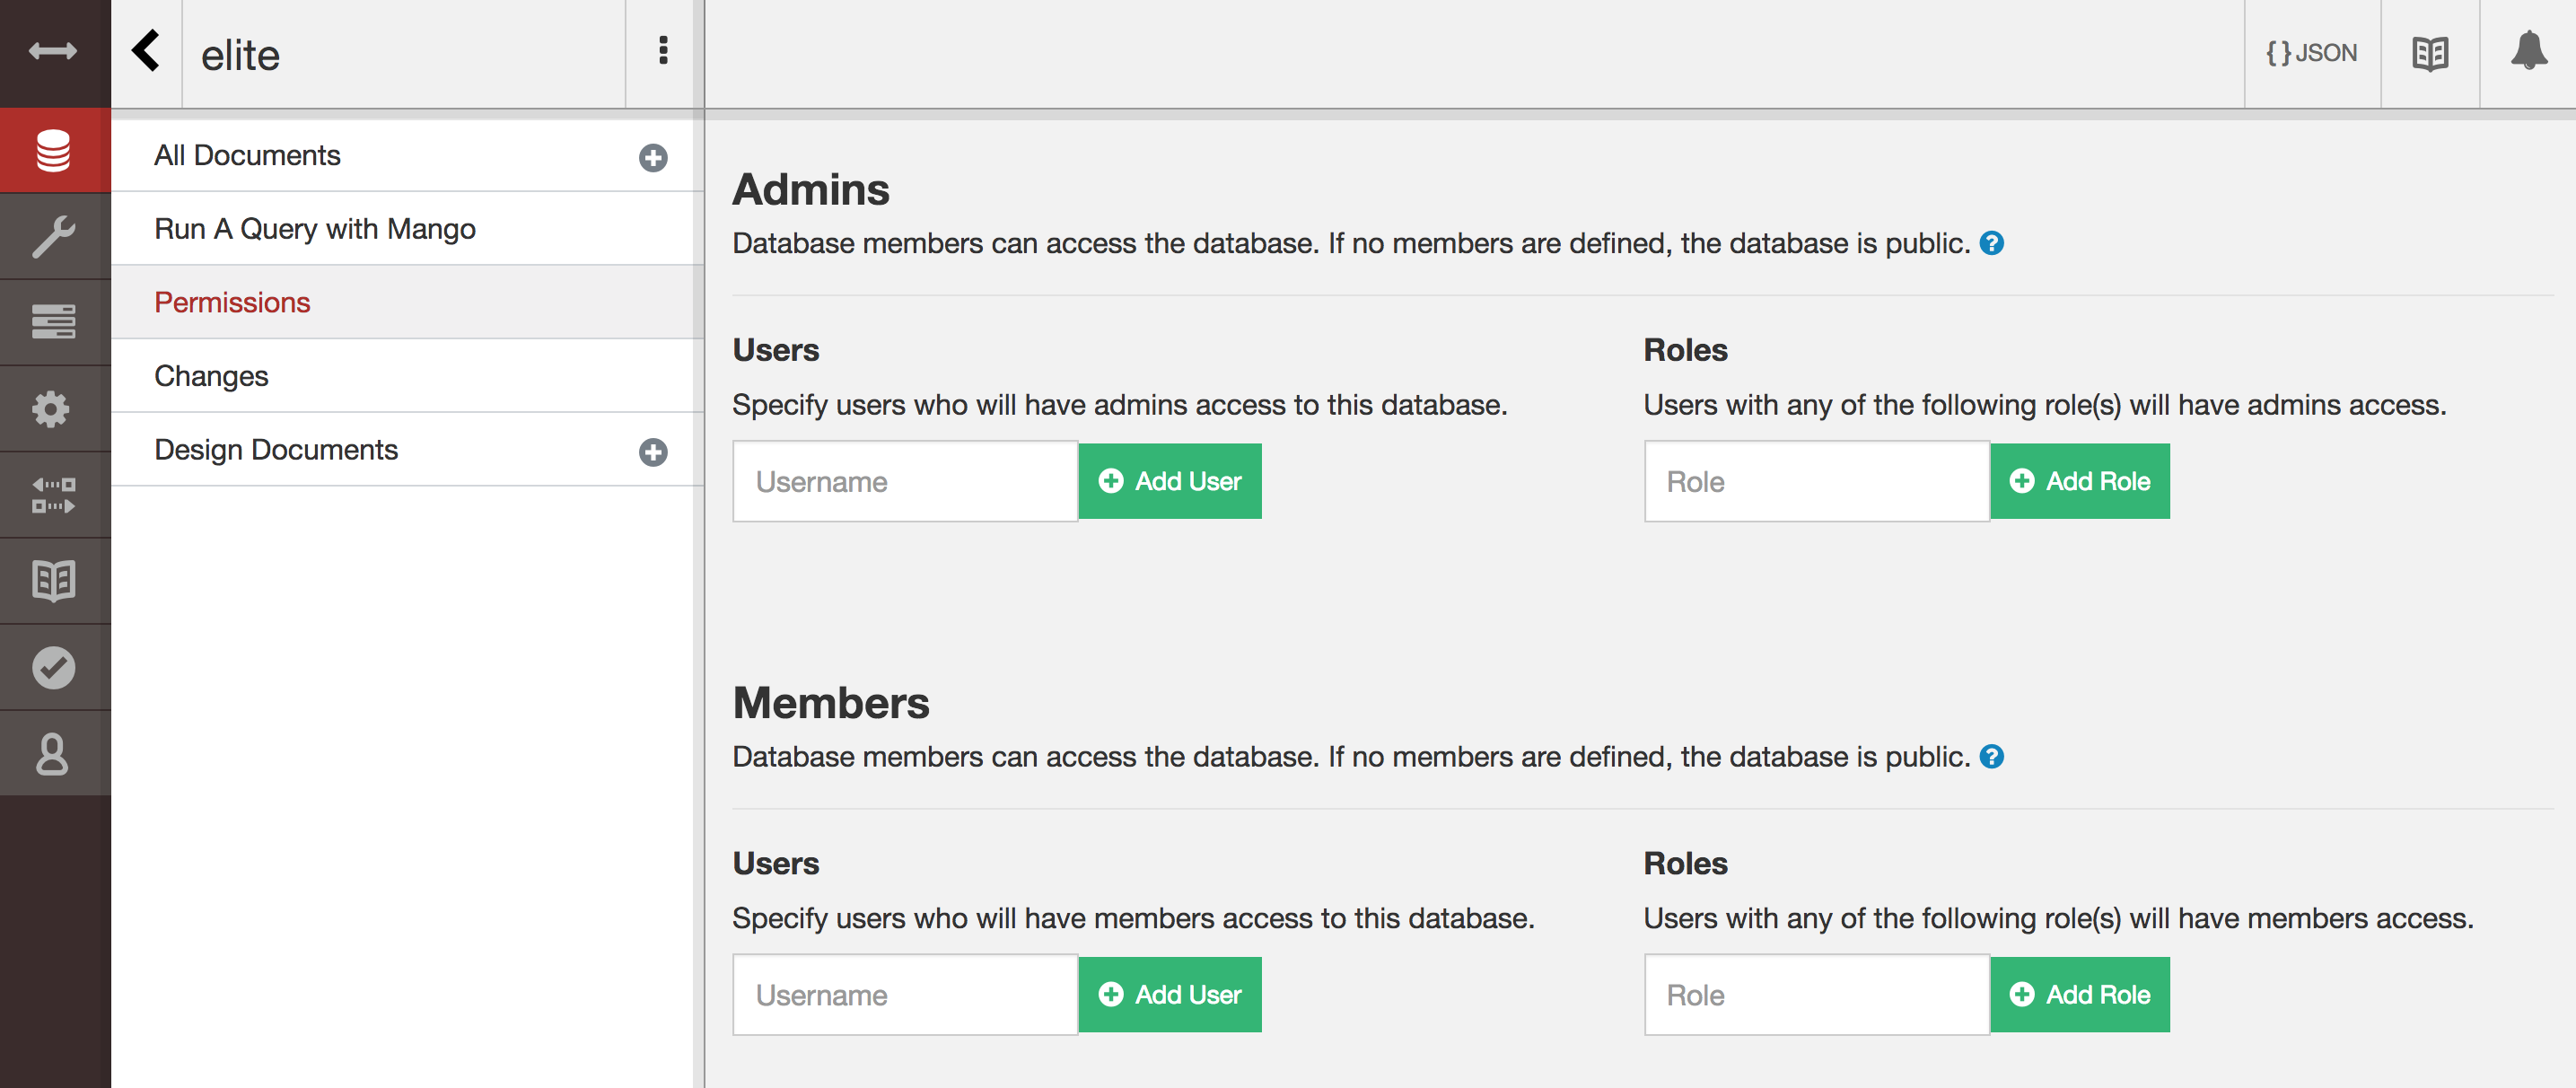
In order to add a user to a database, you will need to go to the Permissions tab inside of the database you are replicating to:

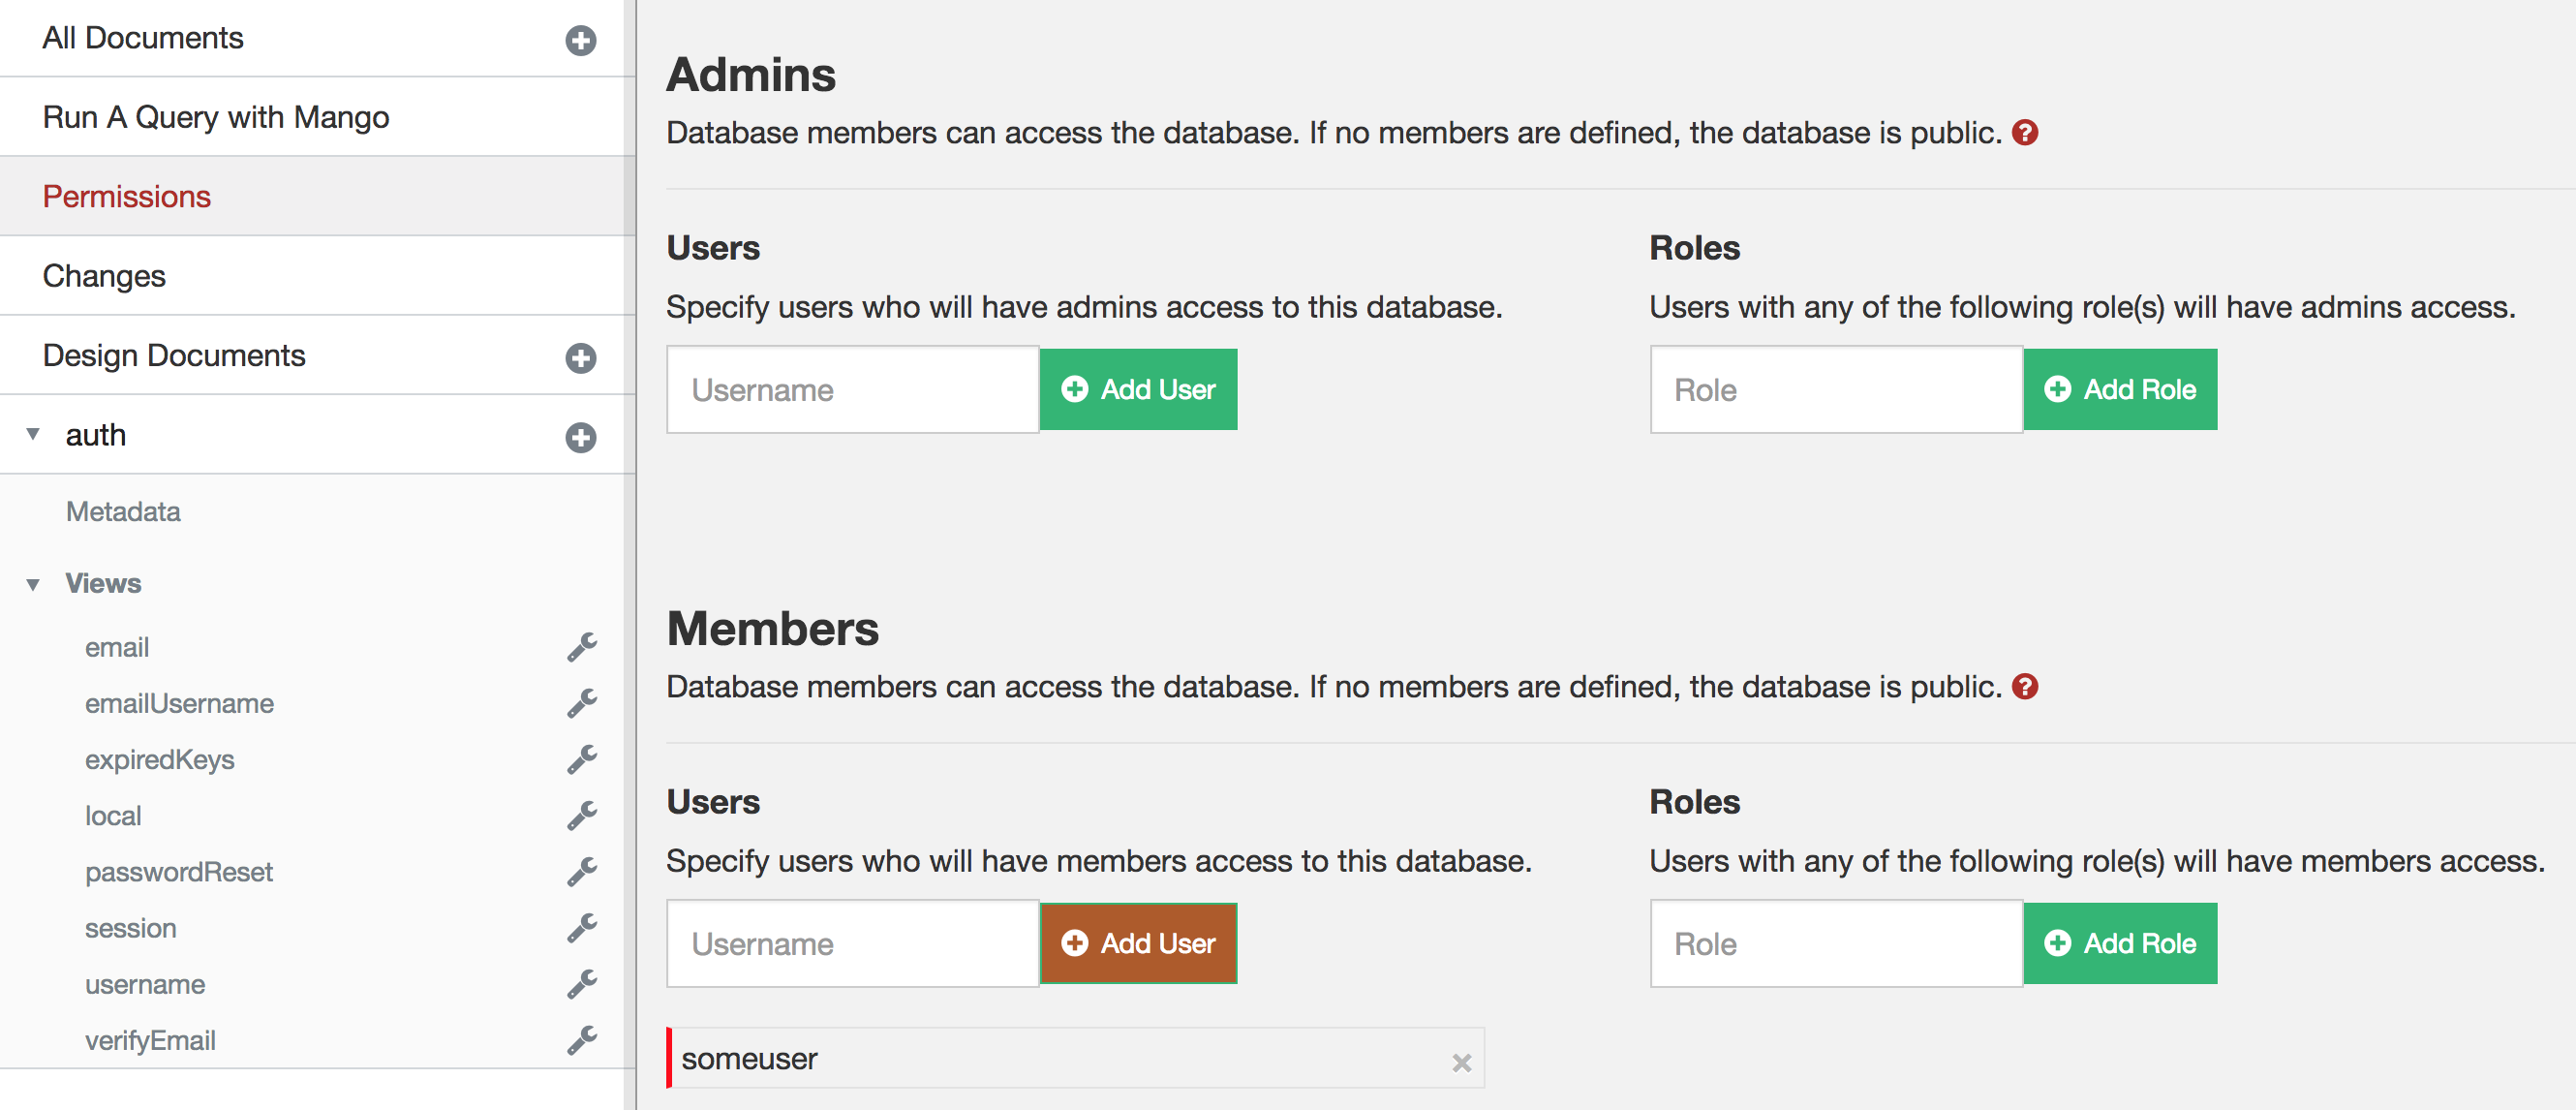
Here, you will need to add a user from your _users database as a Member:

Once you have added a member to the database, it will no longer be publicly accessible. You should always verify this yourself by attempting to access the database without any credentials:
curl -X GET 'https://mydomain.com:6984/databasename/'If you do not already have a user defined in your _users database, you can create one using the instructions below.
Creating a User in CouchDB
To create a user in CouchDB, we need to send a PUT request to our CouchDB installation. This PUT request will create a new document in the _users database with an _id using the following format:
org.couchdb.user:USERNAMEYou will also need to supply a document containing the name, password, roles, and type. You can execute this PUT request with the following command:
curl -X PUT 'https://COUCHDB_ADMIN_USERNAME:COUCHDB_ADMIN_PASSWORD@yourdomain.com:6984/_users/org.couchdb.user:USERNAME' -H "Accept: application/json" -H "Content-Type: application/json" -d '{"name": "USERNAME", "password": "PASSWORD", "roles": [], "type": "user"}'Make sure to substitute your own values:
- COUCHDB_ADMIN_USERNAME – The username for an admin user for your CouchDB installation
- COUCHDB_ADMIN_PASSWORD – The password for an admin user for your CouchDB installation
- USERNAME – The username for the user you want to create (make sure replace both instances of
USERNAMEin the above) - PASSWORD – The password for the user you want to create
Replicating the Source Database
The rest of the process is quite simple. Log in to your Cloudant database, and go to the Replication tab:

From there, you will need to click on New Replication. You will then be taken to a screen with some information to fill out:

You should supply the following information:
- Set the Replication Source to Local database
- Set the Source Name as the database that you want to replicate
- Set the Replication Target as New Remote Database or Existing Remote Database
- Set New Database to the URL of the database you are replicating to, including admin credentials if necessary (i.e.
https://admin:mypassword@mydomain.com:6984/databasename) - Set the Replication Type to One time
Once you have entered the appropriate information (make sure to double check everything) you can click Start Replication. If you go back to the main replication tab, you should see an entry for the replication. Its state will be ‘Running’ until it has completed. At which point it should say ‘Completed’. This process should happen very quickly.
If you look in your target CouchDB database, the database in its entirety should now be copied over.
Summary
Once you know what you are doing, the process of moving an entire database somewhere else takes just a minute or two. This is pretty spectacular, and it gives you a lot of confidence knowing how portable your infrastructure is. Usually, relying on a DBaaS (Database as a Service), whilst extremely convenient, means marrying your backend infrastructure to them with ugly divorce proceedings should things go awry. It may seem unlikely for a behemoth to just shut up shop, or make drastic/unacceptable changes, but it happens.
Knowing that you can easily move your CouchDB data anywhere means you can use a service like Cloudant, comfortably knowing that if the need arises you can move somewhere else quickly.

