In a previous tutorial I’ve shown you how to create an animated sprite with a spritesheet in Phaser. In this tutorial I’m going to show you how to use something called a texture atlas instead. Here’s an animation I created recently for a game I’m building using a texture atlas:

I’m going to jump right into how to use a texture atlas for animations in this tutorial so if you want a little more background on sprites and how we can use them for animations check out this tutorial first – make sure to come back to this tutorial though, using an atlas is far superior to using a spritesheet.
A texture atlas places all of your sprites into a single file (much like a normal spritesheet) and uses either an XML or JSON file to describe where each sprite begins and ends (kind of like a HTML map if you remember ever using those). Take a look at the following example of an atlas vs a spritesheet that we could use with Phaser:
(sorry about the watermark lines, I purchased these sprites so can’t share them unfortunately!)
I started using spritesheets for my animations initially because it is the first thing I came across and assumed it was the way sprite animations should be done, however after reading this response from Richard Davey:
There is no technical advantage of using a sprite sheet at all. They tend to use more space both in memory and bandwidth because they don’t pack frame data as efficiently as a texture atlas does. However, there are lots of legacy graphics out there in that format, and its still quite popular today. So we support them. But you should try and pack graphics into atlases where possible to save on ram.
I switched to using an atlas instead. Richard is the creator of Phaser so it’s safe to say he probably knows what he’s talking about.
Basically, you can do everything that you can do with a spritesheet with an atlas and:
- An atlas uses less memory and bandwidth
- When using an atlas each element is only drawn once (a spritesheet is redrawn every frame)
- Not all frames have to be the same size when using an atlas.
- It’s easier to refer to frames by name rather than by index
I’m going to go over how you can create your own texture atlas and how to use it to create animations in Phaser.
Creating a Texture Atlas for Phaser
A lot of people use Texture Packer to create sprites and atlases but it is a paid tool after the free trial. I’ve been using this free tool recently which seems to do the job very well. There’s also a variety of other tools out there to do this including web based ones and even command line based tools.
What these tools will do is arrange all of the sprites you upload into a single .png file, and they will also create either a JSON or XML file that describes the coordinates of where each sprite begins and ends so that Phaser will know how to display it.
Create your spriteatlas.png file and spriteatlas.json OR spriteatlas.xml file
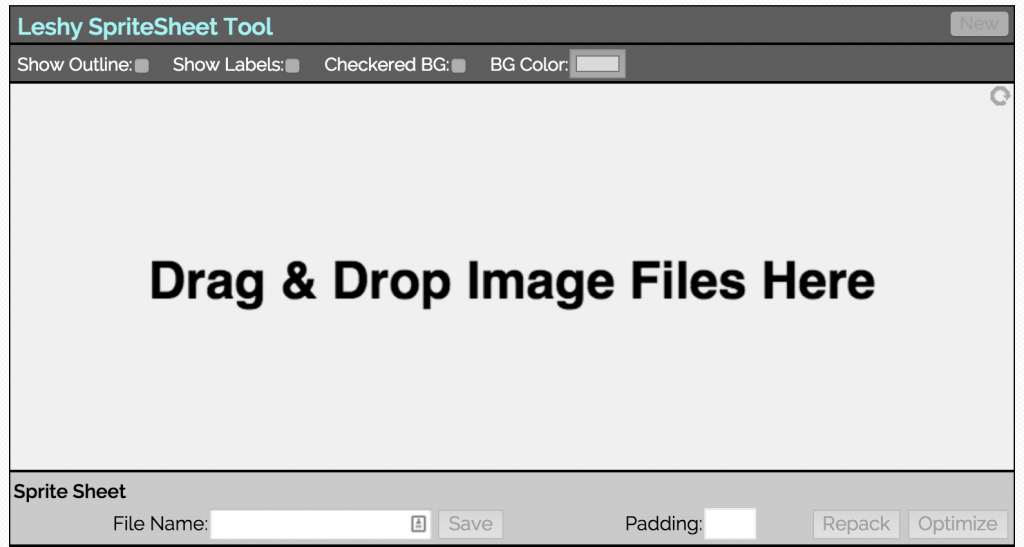
As I mentioned, there’s a variety of ways to do this depending on what tool you use (technically, you could even create yourself by using a program like Photoshop, I wouldn’t recommend it though). If you’re using the free tool I mentioned before, you should upload all of the sprites you want to include in the atlas in the box shown below:

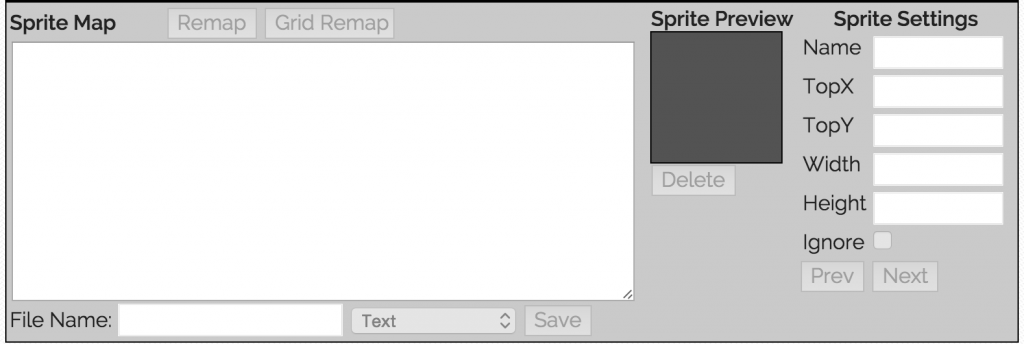
and download the .png file that is generated provided. You should also change the dropdown box that says ‘Text’ in the following:

to either XML or JSON-TP-Array depending on whether you want to use XML or JSON (I will be using JSON for the rest of this example) and then download the resulting file as well. Once you upload some images the textbox field in the image above will contain your JSON or XML file.
Place both the .png and .xml OR .json file into your games assets folder
We will need to load both of these files into the game so you should place them both within the assets folder. The .png file is probably pretty obvious, but let’s take a look at the .json file (As I said, I’m going to be using JSON for the rest of this tutorial, but the XML version is basically the same idea, just sligthly different formatting).
         "filename":"dying1",
         "frame":{
            "x":954,
            "y":256,
            "w":230,
            "h":296
         },
         "rotated":false,
         "trimmed":false,
         "spriteSourceSize":{
            "x":0,
            "y":0,
            "w":230,
            "h":296
         },
         "sourceSize":{
            "w":230,
            "h":296
         }
      },
      {
         "filename":"dying2",
         "frame":{
            "x":522,
            "y":905,
            "w":246,
            "h":294
         },
         "rotated":false,
         "trimmed":false,
         "spriteSourceSize":{
            "x":0,
            "y":0,
            "w":246,
            "h":294
         },
         "sourceSize":{
            "w":246,
            "h":294
         }
      },
This is an example from a game I’m currently building, and shows two frames from my atlas file (I dumped all the rest because it is a very long file). The important parts here are that it provides a name for a specific sprite and also provides the coordinates for where it is located in the image.
Now if we refer to a specific sprite by it’s frame name, Phaser will know how to display it.
Creating an Animation in Phaser using a Texture Atlas
The way you create animations with an atlas is pretty similar to the way you do it for a spritesheet, but it is slightly different. First, let’s load up our assets.
Add the following code to your preload method:
//this.game.load.atlasXML('mysprite', 'assets/sprites.png', 'assets/sprites.xml');
this.game.load.atlas('mysprite', 'assets/sprites.png', 'assets/sprites.json');
NOTE: In the example above I’ve used a JSON file for the atlas, if you are using XML make sure to use the atlasXML function instead
Next we will add the sprite to the game (the same way you would any sprite) and create an animation for it.
Add the following to the create method of your games main state
this.sprite = me.game.add.sprite(me.game.world.centerX, 300, 'mysprite');
this.sprite.animations.add(
  'dying',
  Phaser.Animation.generateFrameNames('dying', 1, 6),
  5,
  true
);
As you can see the animations.add() function call is the same as what you would usually do, except I’m using the generateFrameNames helper method here. You need to supply an array of frame names that will make up the animation as the second parameter, and rather than writing all these out manually, generateFrameNames will automatically create an array of names for you if they are in a common format.
I have 6 sprites that make up my death animation:
- dying1.png
- dying2.png
- dying3.png
- dying4.png
- dying5.png
- dying6.png
So rather than write all of these out manually, I use this:
Phaser.Animation.generateFrameNames('dying', 1, 6);I supply ‘dying’ as the prefix, and specify the start as 1 and end as 6 so it will generate the following array:
['dying1', 'dying2', 'dying3', 'dying4', 'dying5', 'dying6'];There are also additional parameters you can add to this helper function for different file name formats, for examples you might have named your files something like dying_0001.png instead. You can check out the full documentation for the function here. Of course, you could also just write this out manually if you want but when you’ve got an animation that’s 20 frames long it certainly helps to speed up development and also makes your code look a lot cleaner.
All that’s left to do now is play the animation.
Add the following code to play your animation:
this.sprite.animations.play('dying');and you should end up with something like this:

That’s not actually my death animation, it’s my swimming animation but you get the idea!
Summary
What I really like about using a texture atlas over a sprite sheet is that you don’t have to worry about making all of your sprites the same size (which might not be desirable for your game) and it makes it super easy to generate animations by referencing the names of the files (especially with the help of generateFrameNames) rather than specifying the frame names by number like in my other tutorial.
If you’re currently using spritesheets for animations I highly recommend switching to an atlas.

