The difference between a good app and a great app is in the little details. I think the two biggest contributing factors to what makes an app feel great is paying attention to performance and the design.
Ionic provides a great range of default styling for CSS components, which do look great and simplistic, but if you just keep the default styling your app isn’t going to have any character and it’s going to look like every other application out there.
If you take a look at some of the featured applications in Ionic’s application showcase you will find a lot of these have beautiful custom designs – let’s take a look at a couple:
Mallzee
Sworkit
That’s certainly not to say an application needs to have a custom design to be any good, but it does help you stand out from the crowd. When creating our own custom designs there is primarily two things we will need to take care of, and that is styling and layout.
That’s certainly not to say an application needs to have a custom design to be any good, but it does help you stand out from the crowd. When creating our own custom designs there is primarily two things we will need to take care of, and that is styling and layout.
Styling
When I say styling I’m referring to the CSS styles we apply to elements of our application. It’s important to remember that an app built with Ionic is styled purely with CSS just like any other normal webpage.
You might want to change the colours of buttons, add a gradient, lower their opacity and so on. Maybe you want to change the header bar to a colour that Ionic does not provide by default, or maybe you want use an image background instead. All of this can be achieved simply by adding some CSS rules to the ionic.app.scss file. Ionic uses SASS which provides some extra features ontop of CSS – there’s lots you can do with it but all you need to know is that this ionic.app.scss file will be converted to a normal ionic.app.css file whilst ionic serve is running. You should never add styles directly to the CSS file, it should always be added to the SCSS file.
Layout
It’s easy to change the styling of elements in an application, but the layout can be a little more tricky. Layout refers to where elements sit on the screen and how they behave in relation to each other when the screen size changes.
If you take a look at this screenshot of the Mallzee app:
You can see they’re using a pretty complex layout. First there’s two single column rows followed by a 2 column grid. There’s nothing in Ionic that will create this structure by default, so we would have to create our own custom layout.
Ionic uses a grid system to create layouts, which is very similar to CSS frameworks like Bootstrap if you have ever used any frameworks like that. I’ve gone into a little more detail about how this works in a previous tutorial so I’d recommend taking a look at that before continuing with this tutorial. In order to create your own custom layouts in Ionic you’re going to have to get familiar with this grid system and CSS Flexbox.
Designing an Attractive Login Screen
I’ve recently written some tutorials on adding user authentication to Ionic applications with Firebase and Parse. These were primarily technical tutorials and didn’t pay much attention to design, so the end result worked but it was a bit… meh.
So in this tutorial we are going to focus on creating an attractive login screen using our own custom styling and layout. First you’ll need a design of course. You can design one yourself if you have some Photoshop skills or get one custom made, but you can find a bunch of great looking designs for free on the web. Make sure you check the license to ensure you have permission to use it for your specific purposes, but it’s usually not hard to find some great free designs.
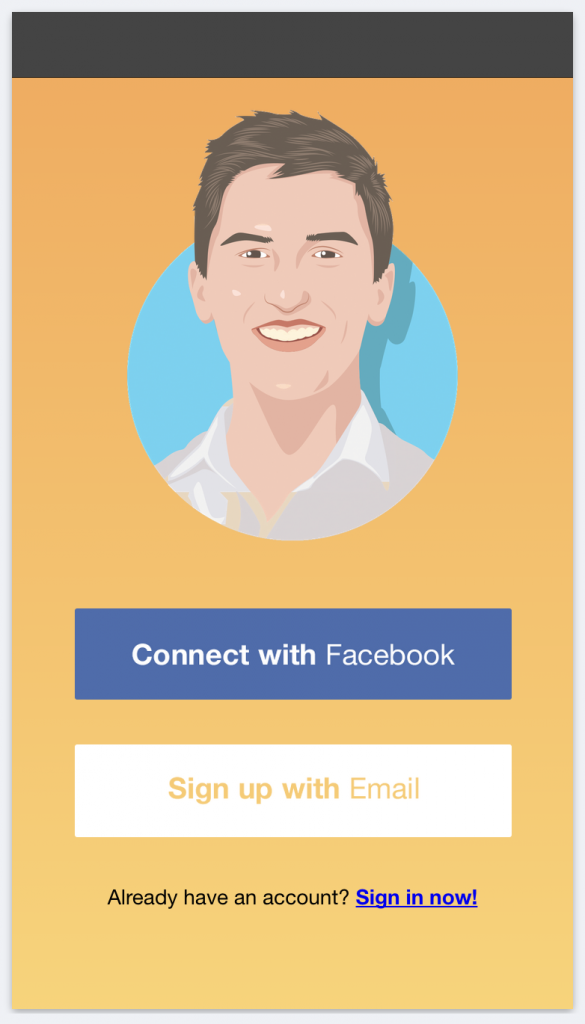
We’ll be walking through how to design this login screen:
This is based on a freebie UI design I downloaded a while ago, which unfortunately I’ve lost the source for. If you happen to find it please feel free to leave a link in the comments, but I’ve included all the graphical resources you’ll require for this design in the download at the end of this post.
We’ll just be using Facebook and Email sign up buttons (since that is what I’ve been using in my previous tutorials) but you will quite easily be able to add in others like a Twitter or Github button if you like.
Ok, let’s get started!
Set up a New Ionic Application
Create a new application by runninng the following command:
ionic start ionic-login blank
Change your directory to the newly created application and then set up SASS:
ionic setup sass
Now that our application is set up we are going to create a view for our login screen. We could just add this directly to the index.html but for the sake of keeping the project well structured (you’ll probably want to add more than just a login screen to your app) let’s create our view using <ion-nav-view> and a separete login.html file.
Create a new folder inside of the www folder called templates
Create a new file inside the templates folder called login.html with the following code:
<ion-view>
  <ion-content scroll="false"> One day I'll be a real page. </ion-content>
</ion-view>
Once the template is created we need to create a route for it so that the application knows to display it.
Add the following config to your app.js file:
.config(function($stateProvider, $urlRouterProvider) {

  $stateProvider
  .state('login', {
    url: '/',
    templateUrl: 'templates/login.html'
  });

  $urlRouterProvider.otherwise("/");

})
and you will also need to modify your index.html to use <ion-nav-view>.
Modify your index.html file by adding the following between the
<body>tags:
<body ng-app="starter">
  <ion-nav-bar align-title="center" class="bar-dark nav-title-slide-ios7">
    <ion-nav-back-button class="button-clear">
      <i class="ion-arrow-left-c"></i> Back
    </ion-nav-back-button>
  </ion-nav-bar>
  <ion-nav-view></ion-nav-view>
</body>
Now we have a login state which uses the login.html file we created as its template. If you run ionic serve now you should see a blank application that looks something like this:
This is a long way away from what we want to end up with, but it’s a solid base to start from. Now we’re going to start modifying our login.html file and the scss/ionic.app.scss file (which is outside of the www folder) to create the layout we want.
Creating the Login Template
Before we get started you’re going to need the graphical resources, so you can either grab the entire source from the download at the bottom of this post, or just save these files directly (**there’s actually another button underneath the Facebook button here but you can’t see it because it’s white! Make sure to grab that one too):
Save both of the above images in the img folder, alongside the Ionic logo.
We’re going to start by setting up our template to use CSS flex box. I’m not going to go too deep into explaining how flex box works (again, you should take a look at this post if you want a better explanation) but basically this will allow us to create elements that expand to fill the available space on the screen, in proportion to other elements. This is obviously useful for something like a mobile application that will run on a whole range of different screen sizes.
Add the following rule to your scss/ionic.app.scss file:
.login-container {
  display: -webkit-flex;
  -webkit-flex-direction: column;
  height: 100%;
  background: -webkit-gradient(
    linear,
    left top,
    left bottom,
    color-stop(0%, #efad62),
    color-stop(100%, #f7d47c)
  );
  background: -webkit-linear-gradient(top, #efad62 0%, #f7d47c 100%);
}
NOTE: It’s important that you use -webkit-flex instead of just flex for it to work properly on Safari and iOS devices.
Modify the code in login.html to reflect the following:
<ion-view>
  <ion-content scroll="false">
    <section class="login-container"></section>
  </ion-content>
</ion-view>
Now everything inside the login-container section will be affected by the rule we added. What we are doing with that rule is enabling flex box by using display: -webkit-flex and then specifying a direction of column. When we are using Flexbox new elements that are added to the screen will flow either left to right if a direction of row is supplied, or top to bottom if column is supplied. The direction of row and column can also be reversed by using row-reverse and column-reverse instead.
So now any new elements we add to our template will sit underneath each other. If you look at the design we are going for, this makes sense since we have a logo, then under that we have the Facebook login button, then underneath that the Email signup button and so on. Let’s add those elements now.
Modify your login.html file to reflect the following
<ion-view>
  <ion-content scroll="false">
    <section class="login-container">
      <div class="col">
        <img src="./img/ionic.png" />
      </div>
      <div class="col button-row">
        <img src="./img/facebook-button.png" />
      </div>
      <div class="col button-row">
        <img src="./img/email-button.png" />
      </div>
      <div class="col">
        Already have an account? <strong><a href="#">Sign in now!</a></strong>
      </div>
    </section>
  </ion-content>
</ion-view>
Add the following class to the ionic.app.scss file:
.login-container > .button-row img {
  max-width: 80%;
}
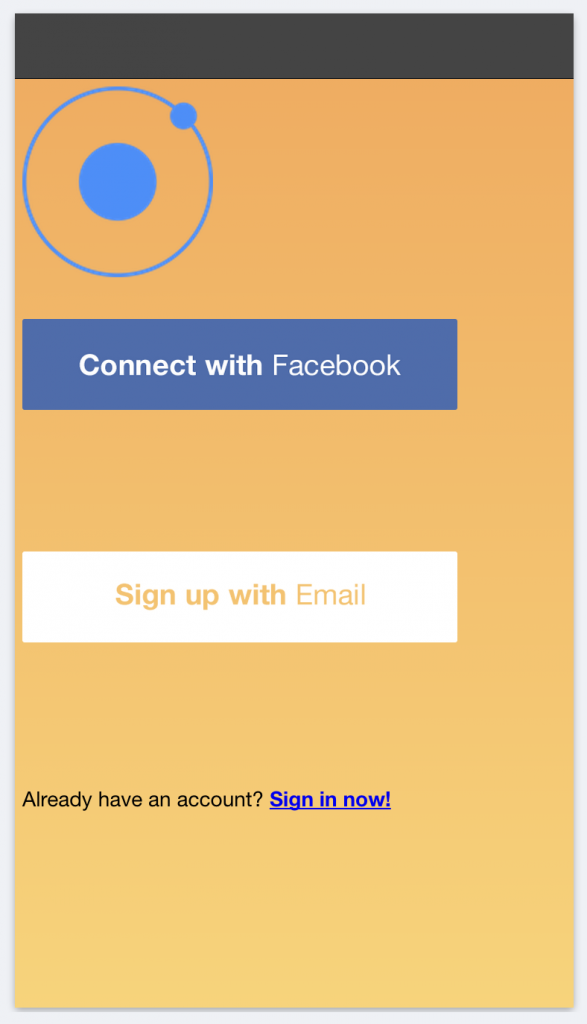
You will notice that we have added our elements within divs with a class of col. This class is provided by Ionic’s Grid System (which is based on Flexbox) and by default will give everything a flex of 1. This means that everything will be evenly spaced and distributed. If you take a look at the application now:
You will see that we have 4 elements on the screen and each takes up a quarter of the screen. We’ve also added an extra class for our image buttons to stop them expanding beyond the bounds of the screen.
This doesn’t look quite how we want it, so we’re going to have to add a bit more styling. First, we want the logo area to be more dominant by taking up more space.
Make the following change to login.html:
<ion-view>
  <ion-content scroll="false">
    <section class="login-container">
      <div class="col header text-center">
        <img src="./img/ionic.png" class="logo" />
      </div>
      <div class="col button-row text-center">
        <img src="./img/facebook-button.png" />
      </div>
      <div class="col button-row text-center">
        <img src="./img/email-button.png" />
      </div>
      <div class="col text-center">
        Already have an account? <strong><a href="#">Sign in now!</a></strong>
      </div>
    </section>
  </ion-content>
</ion-view>
Make the following change to ionic.app.scss:
.login-container > .header {
  -webkit-flex: 4;
  padding-top: 20px;
}
We’ve give the logo area a flex of 4 now. Since the other three elements all still have a flex of 1 this means that it is going to take up 4 times the space of any other element, or 4/7ths of the total space (if you add up the flex of all of the elements you get 4 + 1 + 1 + 1 which is 7). We also add a bit of padding to this class so that the logo doesn’t sit right at the top.
The text-center class is provided by default and will center the image for us. We’ve also added the text-center class to all the other elements.
That’s about it! We’re pretty much at the final product now, I just swapped out the Ionic logo for my own (the Ionic logo’s great but it doesn’t look so hot on that orange background):
Now you have your own custom login screen which I think looks quite nice. You can combine this with the previous login or chat room tutorials I’ve done to create a pretty sleek looking application. I wanted to keep this tutorial reasonably basic to give people a bit of an intro into using flexbox, but I do plan on releasing tutorials for more complicated designs in future.


